Friday, March 16, 2012

My DIY Sandwich Cookies!

Well after I actually tried making the cookies heres how they turned out:


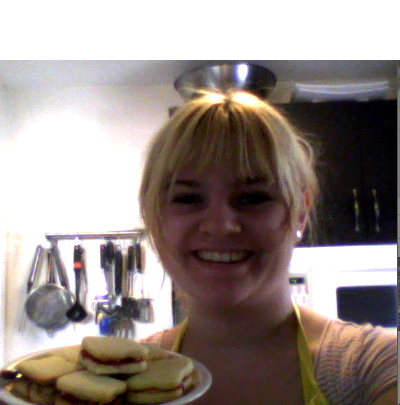
Pretty good if I do say so myself!

YAAAY!

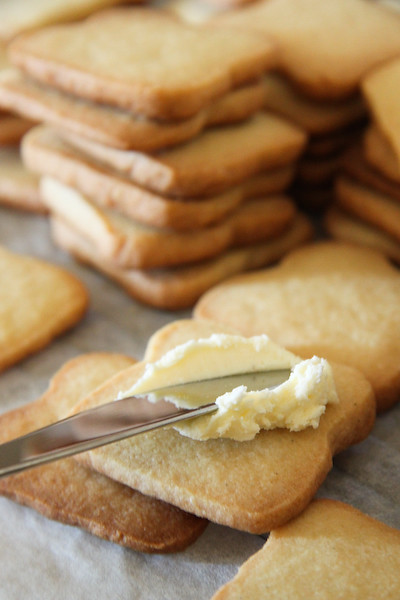
Heres the link to the recipe if you want to try them yourself: http://dimkatrina.blogspot.com/2012/03/diy-pb-cookies.html

Thursday, March 15, 2012

DIY Strawberry Acne Face Mask

Ingredients:

  • 1/4 cup strawberries (fresh, not frozen please)
  • 1/4 cup sour cream or non-flavored yogurt

Preparation:

Mash together the strawberries and yogurt or sour cream. Spread on face and wash after 10-15 minutes.

DIY Yogurt Face Mask

This simple (only two ingredients!) cooling mask is great for soothing a sunburnt face. It's great for all skin types.

Prep Time: 2 hours

Total Time: 2 hours

Ingredients:

  • 1 tbsp natural yogurt, room temperature (not lowfat or non-fat, I like the Greek yogurt "Fage Total" found in many grocery stores these days and pictured here)
  • 1 tsp runny honey (microwave for a few minutes to soften hardened honey)

Preparation:

Combine mixture, then apply to face.
Let sit for 15 minutes.
Wash face with steaming washcloth.
For dry skin, use an extra tsp of honey.
Oily skin? Add a few drops of fresh lime juice.

http://beauty.about.com/od/fragrance/r/yogurtmask.htm 

DIY Cinnimon Sugar Pull Apart Muffins

Makes 6 muffins

Ingredients
  • Pillsbury Simply Rustic French Bread dough
  • 1/2 stick of butter
  • 1 cup sugar
  • 2 teaspoons cinnamon
  • 1/2 teaspoon nutmeg
Directions
  1. Preheat oven to 350ºF.
  2. In a small skillet, brown butter over medium-low heat, about 5 minutes.  You know the butter is browned when it turns a light caramel color and smells slightly nutty.  ((Be careful not to burn the butter!))  Once browned, set the butter aside to cool.
  3. Remove bread dough from tube and place on a cutting board.  Starting in the middle, divide the dough with a small slit.  The divide again and again until you have 31 slits.  Using a very sharp knife, slice the dough.  You should end up with 32 slices.  Flatten each slice with you hands or a rolling pin and place on a sheet of parchment or wax paper. 
  4. In a bowl, combine the sugar, cinnamon, and nutmeg.
  5. To assemble the muffins, brush each dough slice with the brown butter.  Then sprinkle with the entire sugar mixture.  (Yes, ALL of the cinnamon sugar!)  Stack the dough slice on top of each other. (some stacks will have five slices and some will have six.)  Using a sharp knife, slice the stacks down the middle.
  6. Place two of the sliced stacks, side by side, cut side down into a greased muffin tin.  Repeat with the rest of the stacks.
  7. **This step is very important!!**  Before you put the muffin tin in the oven place it on a larger, rimmed baking sheet.  This will catch any butter/sugar overflow and avoid a very smokey oven.
  8. Bake muffins for 20-25 minutes until tops are golden brown.  Allow to cool for 10 minutes.  Gently remove.  Enjoy!!

DIY Whiteout Cocoa

8-10 servings                                                                                                       [click for printable version]

6 cups skim milk
2 cups fat-free half and half
12 oz. package white chocolate chips (I used Ghiradelli)
1 tablespoon vanilla
Whipped cream and nonpareils for topping

1. Place skim milk, half and half, vanilla and white chocolate chips in a large pot, and place over medium heat.  Stir occasionally until chocolate chips begin to melt, then reduce heat to medium-low. 

2. Cook, stirring occasionally until mixture is very hot and chips are melted.  Divide mixture between mugs and top with whipped cream and sprinkles.  Serve immediately.

Note: If the mixture is left for very long at room temperature, the fat from the white chocolate will rise to the surface.  Be sure to gently re-heat the mixture a give it a good stir before serving!

http://www.sprinklebakes.com/2012/02/whiteout-cocoa.html

DIY Dark Chocolate Peanut butter Banana Bites


Yield: appx 20

ingredients:

2 large bananas, sliced 1/2 inch thick rounds
1/4 cup powdered sugar
2 tablespoons creamy peanut butter
1 tablespoon heavy cream
4 oz 62% cocoa chocolate, chopped
Fleur de Sel (fancy, flaky, French sea salt), to taste

directions:

Line multiple cookie sheets with wax paper. Place banana slices in rows. Set aside.
Whisk together powdered sugar, peanut butter, and heavy cream until smooth. Transfer to a ziplock baggie and cut off the tip. Pipe on to the top of the banana slices. Set aside.
In a double boiler (or glass bowl) over simmering water, melt 2 oz of the chopped chocolate. Stir with a spatula until completely melted. Once melted, continue cooking until the chocolate reaches a temperature of 115°F.
Immediately remove double boiler from the heat. Begin slowly adding in the remaining 2 oz chopped chocolate, stirring constantly. Continue stirring until chocolate cools down to 90°F.
Using a spoon and toothpicks (or whatever works for you) coat the peanut butter topped bananas with the tempered chocolate and return to the wax paper. Lightly sprinkle the tops with some Fleur de Sel. Continue until all the bananas have been coated.
Then transfer the cookie sheets to the fridge and let harden for 2 hours. At this point you have a few options:
1. Eat Immediately: This one is pretty self explanatory! ;)
2. Eat Gradually: If you are going to eat them throughout the week, transfer to an airtight container (or a ziplock baggie) and grab them whenever you need a sweet treat. If you are storing them longer than 7 days, freeze them instead.
3. Freeze: Transfer to an airtight container (or a ziplock baggie) and freeze for up to 3 months. Eat directly from the freezer if that's your thing, or let cool on the counter for 15 minutes before eating!
Nutrition Info:
Per 1 Banana Bite: Calories 49. Fat 3.2. Carb 6.4. Protein 1. Fiber 0.5.

http://www.thenovicechefblog.com/2012/03/dark-chocolate-peanut-butter-banana-bites/ 


DIY Feather Extentions

Materials Needed:1. Jewelry Pliars (the kind with the teeth are best because you can use them to take the feather extensions out once you are done with them.)
2. Micro Crimp Bead (the pictured clip has silicone in the center, this helps it hold the feathers better)
3. Piece of fishing line.
4. Feathers! Below are links to a few of my favorite shops to buy feathers from.
Jewel Candy Boutique – The pack on the right is from Maura at Jewel Candy Boutique on Etsy. She hand dyes the feathers herself and makes awesome color mixes. These are a great deal too.
Lamplight Feathers – Great prices, you have to buy a few more but it is worth it if you have friends who also want feather extensions. You can also use extra feathers to make Feather Earrings.
Beary Box – This shop has lots of the bulk feathers that are shorter and come in packs of a few hundred. Also they have the longer extension feathers for a good price. Shipping takes a little while but the product is great. This is also the shop that sells the Peacock Feathers I used in my Peacock Feather Earring Tutorial.
Quinn Johnson’s Designs – Quinn also dyes all the feathers herself and has the option where you choose your own mix.
You can find lots of other buying options on Etsy or you can find feathers at your local fishing shop. Many of the feathers used for extensions are the same type used for fly fishing.
First hold the feathers up to the hair to see where you want them to be. I usually place them towards the front and if you are putting extensions in your own hair it is easiest to do it right if they are in the front.
Pull back the top layer of hair depending on the thickness of the hair you will have to pull back more or less. On people with finer hair I have to put the clip lower down so it does not show through. Grab a small section of hair that is all from the same spot on the head. As shown in the picture above.
With your fishing line create a loop around the hair and then thread the two ends through the crimp bead. Once you have it as the picture shows pull on the ends of the fishing line until the hair is pulled through the crimp bead.
Do It Yourself Feather Extensions
Once you have pulled the hair though the crimp bead, gently move the bead to the roots of the hair.
Once you have the bead at the roots of the hair begin feeding the feathers into the clip. Start with the feather you want at the bottom of the group.
Feather Extensions
feather extensions
do it yourself feather extensionsOnce all the feathers are in you are ready to crimp the micro crimp bead.
While holding the feathers in place with one hand use your other hand to grab the crimp bead with your pliars. Then crimp the bead. It will lay flattest if you make the smashed bead parallel to your head. As shown in the picture below.
DIY feather extensionsPut the rest of the hair back over the clip and see how it looks! It is probably wise to buy a few extra clips so you can change the location of the feathers as desired. Some times they seem like they will look good in one spot and later you will realize they don’t. If you need to remove the feathers simply smash the bead the opposite way it is already smashed with the pliers.
Feather Extensions
Feather Exensions
There are lots of great places to put the feathers. The base of the hair line in the back. Or your bangs (see the first picture in this post). You can also place them in the hair right in front of your ears the pieces that fall out when you put your hair up. You will need to be creative in hiding the clip if you put the feathers where you don’t have a lot of hair. Good luck! Send me pics of your successes and fails ;)

DIY P.B. &J. cookies

PB&J Cookies/Fairy Bread Biscuits
(adapted from Martha Stewart's sugar cookie recipe, makes approx 60 cookies or 30 sandwiched cookies - feel free to halve recipe)
600g sifted plain flour (approx 4 US cups)
1 teaspoon baking powder
1/2 teaspoon salt
225g unsalted butter, room temperature
400g granulated sugar (approx 2 US cups)
2 large eggs
2 teaspoons pure vanilla extract

For PB&J cookies: peanut butter (or a substitute), jam of your choice
For Fairy Bread biscuits: sprinkles (100s & 1000s to us Aussies), 100g salted butter, 200-250g icing sugar

Sift flour, baking powder, and salt into a bowl. Place butter and sugar in the bowl of an electric mixer fitted with the paddle attachment. (If you're like me and don't have a paddle attachment, a regular mixer works fine on high speed, scraping the bowl down with a spatula every now and then) Mix on medium speed until pale and fluffy. Mix in eggs and vanilla. Reduce speed to low. Gradually mix in flour mixture. The mixture should form a soft & easy to handle, but not sticky dough. Divide dough into quarters; use your hands to roll each quarter into a rectangular block, about 4cmx5cm thick. (If the dough gets too soft, chill it for 10 mins so that it firms up) Using your thumbs and forefingers, pinch along the middle of the top and the two sides to form indents along the length of the block, so that the dough resembles a bread loaf. (See photo below) Keep the bottom of the block flat. Wrap in clingfilm and refrigerate until firm; at least 1 hour or overnight.
pbj_fairy_cookies-coll
Preheat oven to 180 degrees C and line baking sheets with baking paper. Remove dough from the fridge and use a sharp knife to slice 0.4cm slices of 'bread'. Slice them thinner if you plan on sandwiching two slices together in your final cookies. Place on baking sheet, leaving at least 3cm between each cookie. While you are slicing up your dough, place your prepared sheets of sliced cookies in the fridge to stay cool. Bake for 15-18 minutes, until edges turn golden. Let cool on baking sheets on wire rack.
pbj_fairy_cookies-14
When completely cool, spread peanut butter & jam on the cookies, sandwiching two together if you prefer, or you can keep them open. If you are making the fairy bread biscuits, remove butter from fridge 30 mins before starting. Beat butter with an electric mixer on high until it is fluffy and pale. Sift icing sugar in, beating to combine. You can keep adding icing sugar until it reaches your desired consistensy. Spread thinly over biscuits and dip into sprinkles. Can be stored for several days in an airtight container.
pbj_fairy_cookies-5

DIY Shirt Skirt


More recession chic people! The shirtskirt is simple, versatile, and so very comfortable. You can make one in 10 min with an old, oversized men´s shirt, a bit of thread and elastic band. Cut the shirt according to the desired length (stitch elastic at the top) and fold the top with elastic band. Sew the arms together to serve as a belt/sash and add a few belt loops from the excess fabric. Found at Fashionindie.com.

DIY Simple Bow Shirt


Materials:

                 5/6 + yard knit     &     1/3 yard  silk, cotton, etc.                                     (any of these fabrics would work)


My knit is 60" wide  and my dusty pink silk (faux) is 45" wide.
Your fabric doesn't have to be exactly as wide as mine, just keep in mind that if you buy a fabric that is less wide you may need to purchase more to compensate.


Cut two large squares to the dimensions of  30" x 30"

If you bought 5/6 yd of 60" fabric all you have to do is cut along the fold line.

**Edit- 30" length gives you a long top. I ended up cutting off 4-5" off the bottom. I left the measurements this long to allow plenty of length and room for the bottom to be hemmed**


Make a casing at the top of each square. About 2" wide. 


Sew down with a zig zag stitch (so it can stretch).


Start working on your sash. This is pretty much the same process used here in the big bow belt tutorial. 

-UPDATE- 

I made a mistake when I made my sash and cut where I shouldn't have. So your process may look slightly different than mine in the pictures to follow. When in doubt follow the instructions and don't let the pictures confuse you (:

....

Cut right down the middle of your fabric so that you have two 45" by 6" strips. 


Sew your two strips together (Short sides with right sides together)


Now that you have sewn your two strips together you have a 6" wide by 90" long strip. Fold the sash in half hot dog style and sew a point as shown below. Then continue to sew down the long (90") side.


Leave about an 8" gap in this seam so that the sash can be turned inside out. 


Cut off extra fabric


and turn the tube right side out. 

The finished sash will be roughly 90" by 2.5" ( or a little less because of seam allowances).


Press and either sew a top stitch around the entire perimeter or secret stitch your opening.


Use a safety pin to pull the sash through both panels of fabric.


At this point I tried it on and determined where  the seams on the side should begin. I marked this place with a pin. 


Pin along sides. 


and sew together. 


Hem or serge the bottom if you like or leave it raw like I did. 


Voila. Done!  I told you it was easy. 


A breezy, summery top. Perfect for this ridiculously hot weather. 104 here in Texas!


http://sweet-verbena.blogspot.com/2011/07/simple-bow-tie-top-tutorial.html