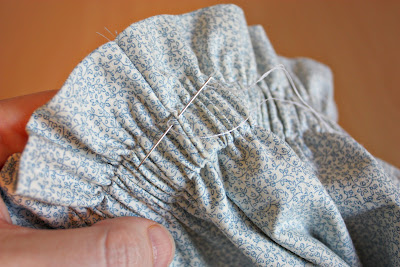
I first started with a piece of fabric that was 45 x 26 inches.
I folded the piece of fabric in half lengthwise, and sewed along the 45 inch side, using a 1/2 inch seam allowance.
Then I turned that long tube right side out, and ironed it flat, with the seam about 3 inches from the top. (Later, this seam will be on the inside of the skirt, and will not show.) The reason for sewing the fabric into a tube and making it a double layer is to give this skirt an extra layer of fabric…….making the skirt stiffer and fuller, and giving the outward appearance a very sturdy shape.
And then the top and bottom are automatically finished nicely. No hems necessary.
Then fold the fabric in half with the two raw edges together.
And pin the two edges together toward the top. Place one pin 1 1/4 inch from the top, and the 2nd pin 1 inch below that. This is where the elastic casing will go, a few steps ahead……so we need to leave an opening. (And make sure that the seam that was ironed flat is towards the outside, so that after you turn this fabric right side out, the seam will be on the inside.)
Then sew along that raw edge with a 1/2 inch seam allowance, making sure to leave that inch between the 2 pins open.
Then turn the tube right side out. So now you have the beginning shape of a skirt, with a fold along the top and the bottom, an ironed horizontal seam on the inside and then this vertical seam that has the one inch opening towards the top.
Then, make sure that this vertical seam is along the very center of this back side of the skirt. Then measure in 2 1/2 inches from both the right edge and the left edge of the skirt…..and place pins to mark it. Then measure down 1 1/4 inch from the top and place pins, making a straight line in between to the two outer pins. Or make a chalk line and skip the pins. (This is the beginnings of casing for the elastic.)
Then make another line of pins, an inch down from the first line of the pins.
Then sew right along those two lines of pins, making 2 parallel lines that are 1 inch apart, with the top line starting 1 1/4 inches from the top and the second line 2 1/4 inches from the top. And both lines should not extend beyond the two end pins that are 2 1/2 inches inward from both edges.
See the seams? This is the casing that we’ll place the elastic in later. (And the reason for measuring in 2 1/2 inches from both sides is because we need more fabric for the front to make pleats……and don’t need as much for the back elastic-gathered side.)
Then turn the skirt over to the front and make pleats about every inch……until you have about 11 inches of pleated material between the 2 pins. (Need more help with pleats? Check out this tutorial here.)
Then iron the pleats along the top by the pins, just a bit, to help the pleats all lay flat. (But don’t iron the pleats all the way down to the bottom of the skirt.)
Then make a seam starting at the first pleat on one side, all the way across the pleats to the other side…….about 1 1/4 inches from the top edge. Then make another seam 1 inch below that. These seams don’t have to be perfectly measured……they are just keeping the pleats in place, but the seams will always be covered by the little waist tie and bow.
Then I turned the skirt over to the back.
Then I cut a piece of 3/4 inch wide elastic that was 7 inches long. And placed a safety pin at both ends.
This is where I hit my forehead with the palm of my hand………”dang it”. The plan was to use that little one inch opening and thread in the elastic and then I realized……..how am I going to get that little pin back out. The skirt is sewn into a tube and there’s no exit. So I just went with it.
I threaded the elastic to the left first, all the way to the end, until I met up with the pleats. Then I pushed the pin as much out of the way that I could, and made a seam at the edge, sewing the elastic to the skirt……..right by the edge of the pleats. So that secured one end of the elastic in place. Then I did the same thing with the right end of the elastic and sewed it into place on the far right side by those pleats. And now there are 2 little floater safety pins that will never be seen again. Oh well!
Then I hand-stitched that little opening closed on the outside and on the inside.
Okay……do you want to keep your safety pins and try it a different way? (Sorry, no pictures.)
Well, way back at this step when you turned your long 45 inch tube right side out and ironed it flat……
……..instead of sewing those two raw edges together to make the skirt shape, cut that long strip into two pieces. Measure 17 1/2 inches over from one raw end and cut that piece off…..and then you’re left with a piece that is 27 1/2 inches wide. So now you have two tube pieces that have nice folds along the top and bottom and raw edges along both sides…….the 27 1/2 inch wide piece will be your front piece with the pleats that the 17 1/2 inch wide piece will be your back piece with the elastic casing.
Make sense?
So make your pleats along the front piece just like shown above, leaving about an inch free at both ends. Then iron and sew your pleats just like shown above. Then make your casing for the elastic the same as above…..but sew all the way to the end on both sides. And then thread your elastic through the casing and sew each end of elastic to each end of the fabric…..securing it in place about 1/2 inch from each end. And be sure to remove your safety pins!!! :)
Then place the front piece (with the pleats) and the back piece (with the elastic) together with right sides together and sew along each side, using a 1/2 inch seam allowance. Then zig-zag to finish off the raw edges.
Turn right side out and press each side seam open flat.
I know, I should have done that from the beginning. Maybe I was trying to save a step unknowingly??
Oh well. You sew, you learn.
Okay, continuing on……
Cut a long strip of fabric that is 60 x 6 inches. Sew this piece into a tube, turn right side out, and press flat.
(Need help sewing a tube? Click here for help.)
(Need help sewing a tube? Click here for help.)
Then cut off each end at a diagonal…….
Then, tuck the raw ends towards the inside of the tube, pin into place………
Then, sew the end shut. Repeat with the other end. (You can keep the ends straight too. Either way.)
Now onto the little belt loops. Cut a little strip of fabric that is 1 x 15 inches.
Then fold this strip of fabric in half lengthwise (right side of fabric is facing out)………
Then open it back up and fold each raw edge in towards that center fold……then fold back in half along that ironed center fold. (I do this on the ironing board and fold a little, place the iron on top of it, fold a little more, move the iron over, etc.)
The sew along the long outer edge, sewing the long strip shut.
I wanted 5 belt loops and I cut off about 2 1/2 inches for each belt loop. I placed loops at both sides of the skirt, and then two more on the front……..
…..and then one at the center back.
To attach the belt loops, I folded each end under about a 1/4 inch, the sewed along each end….securing the belt loop to the skirt.


Then I threaded the little tie through all of the loops………
Then I placed the skirt on my little girl and tied the ends into a nice big bow.
And that was that.
**Edited to add:
Many of you posted comments about making this same skirt in adult sizes. I thought I’d post the info here, so more would see it.
If you are wanting to make one in your size, you will construct the skirt exactly the same way. The difference is the piece of fabric you start out with. So let’s say you have a 30 inch waist and you want to dress to be 20 inches long (remember to add extra length because you wear the dress up a little higher)…….you will double the width of the piece of fabric to give it enough fullness to add the pleats and gathered back. And you will also double the height because the skirt is folded in half to give it two layers…..making it a bit stiffer. And then add an inch to both of those dimensions, for a seam allowance.
So you will need a piece of fabric that is 61 inches wide and 41 inches tall.
Then fold it in half lengthwise, just like shown above……and either make it the way I did (with the lost safety pins), or cut a front and back piece. If you cut a front and back piece, make the front piece wider than the back piece, allowing for more room to make pleats.


No comments:
Post a Comment